
Start Up Guide
Visual Data App Builder (VDAB) is low-code / no-code platform designed to help you build and deploy Databricks apps. This guide will walk you through how to get started on VDAB and begin making your own applications.
1. Creating an Account
To get started with VDAB, the first thing you have to do is create an account. To do so, start by heading to https://app.vdab.ai and fill out the account creation form.
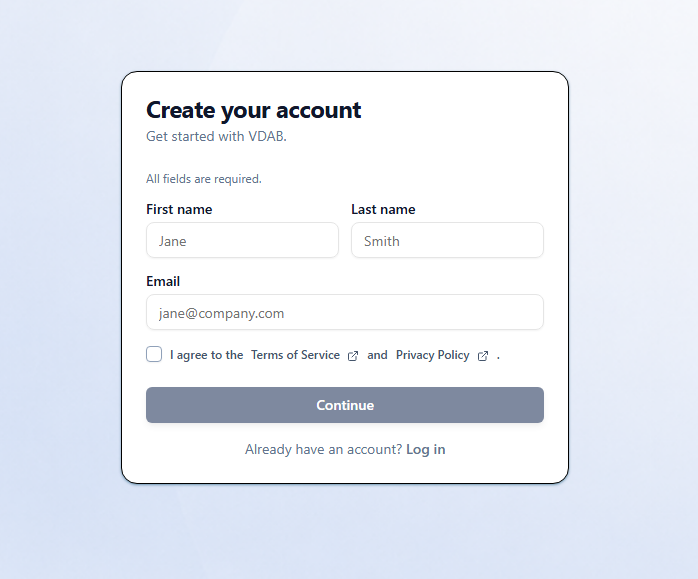
You will then have to confirm the entered email, and once that is done, you will be redirected to the Password Creation section of the sign up. Create your password and then log in to your new account!
2. Account Setup
Now that you are logged in, you will have to select a Subscription Tier for your new account.
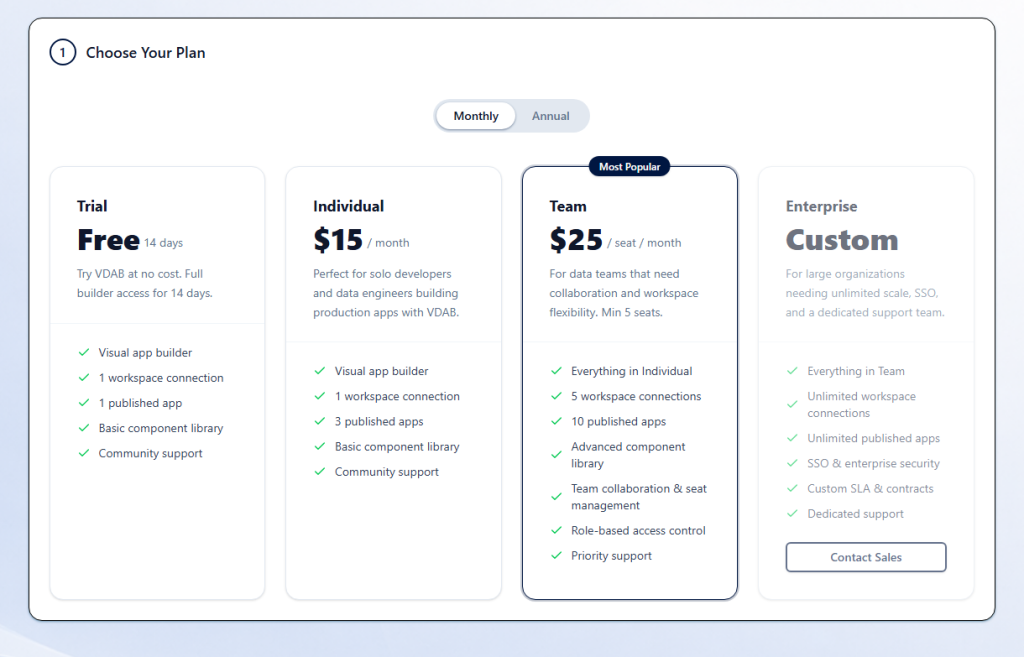
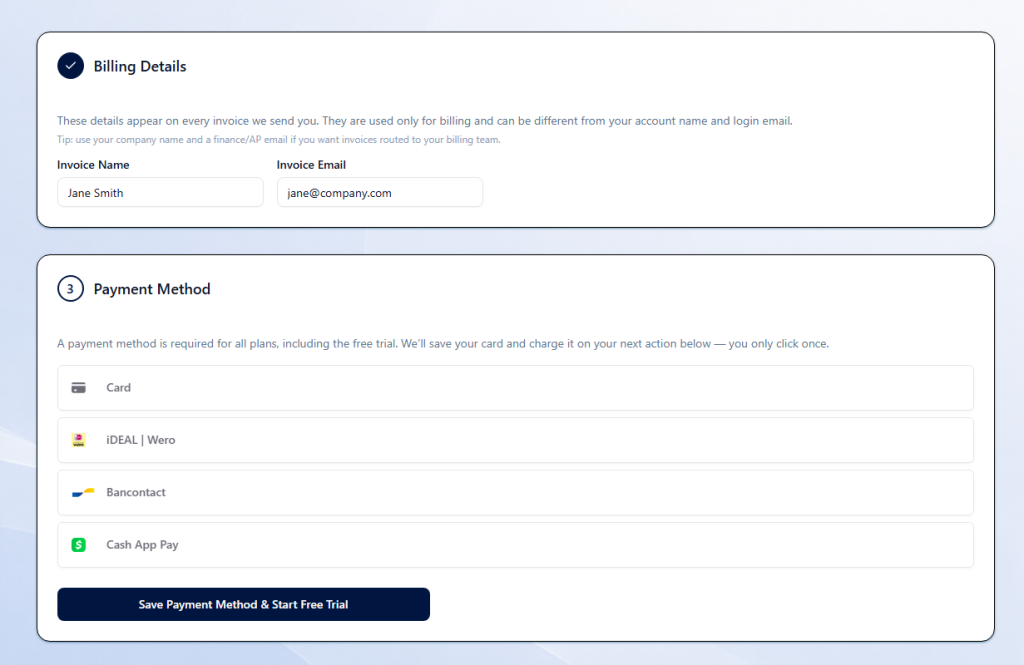
Then add your Billing Details and a Payment Method to complete the account setup.
3. Connecting to a Databricks Workspace
Congratulations! You now have a VDAB account created and can start the next steps to get closer to building an application! Before making an application, you need to connect your VDAB account to a Databricks workspace. That way you can access the data stored there and create or link to Databricks apps.
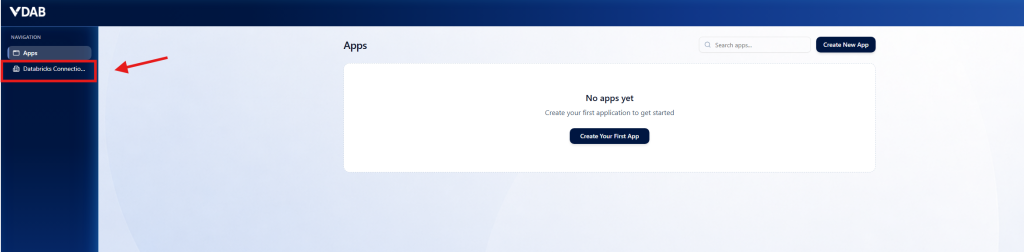
Start by clicking the “Databricks Connections” tab on the left sidebar.
Before continuing on VDAB, you will have to go on to Databricks and into the desired workspace to access the correct credentials. Go to your Databricks workspace, click your workspace name, then select “Manage Account”. On the left sidebar, click Settings, then the “App Connections” tab. Click “Add Connection” and enter a name. Paste the redirect URLs. Click “All APIs” and then “Add”. Copy your Client ID and Client Secret. Note the Access Token TTL and Refresh Token Lifespan configured in your app connection settings.
Finally, paste them all into the correct fields within VDAB, then click “Save”.
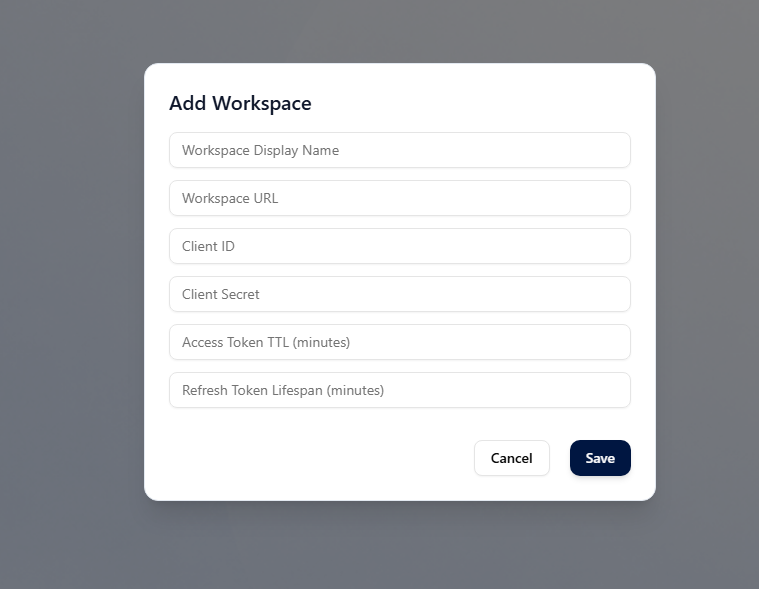
Then, click the “Authorize” button to fully connect to your workspace, and now you are ready to make your first app.
4. Creating an App
Now that you are connected to Databricks, navigate back to the main page of VDAB. Select the “Create New App” button to get started.
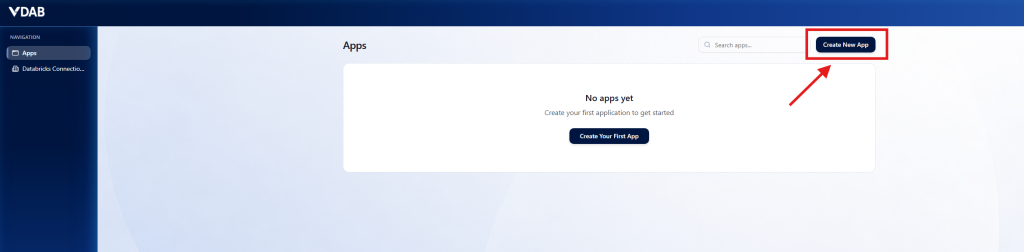
The first step to creating a new VDAB app is to select the workspace you want to link this app to, so you can select the workspace you just linked in the previous step. Then, if you’ve already created a Databricks app that you want to link to this new VDAB app, select the “Link existing Databricks app”, otherwise select “Create new Databricks app” and a new one will be created in your selected Databricks workspace. Finally, fill out the last section of the App Creation form such as the VDAB app name, an optional description, and the Databricks app name. Click the “Create App” button and you will see your new app appear on the main page!
5. Editing the App
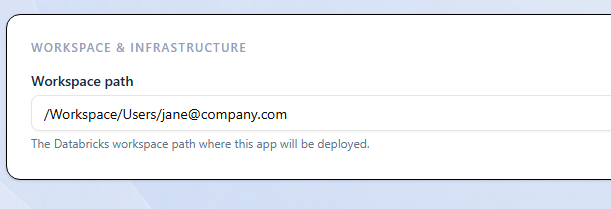
Now that you have an app created, you need to configure it as well as start designing it. To start, select the “Edit” button on your app. Under the “App Details” you should see the information you put into the app creation form such as VDAB app name, the linked Databricks app name, description, and workspace connection. Now, you need to fill out the “Workspace path” field with where you want to deploy the app’s code. For example:
Then, you can navigate to the “App Theme” tab within our VDAB app settings, and set the theming of the app components however you would like.
Now, moving to the “Resources” section, this is where you can add resources such as Autoscaling Lakebases, Unity Catalog tables, Databricks Jobs, Genie Spaces, etc. If you run into any trouble adding specific resources, we have guides located at https://www.vdab.ai/knowledge-base/ for adding specific resources or VDAB components to your applications.
Now that everything is configured, you can get started on actually designing and implementing your app. Navigate to the “Canvas” tab on the left sidebar. Here, you should see your “Main Page” modal, but your app is not limited to a single screen. From this App Flow screen, use the left panel to add new modals. Double-click a page or modal node to open its canvas and design that screen separately from the others. Once inside of a Modal or Page, you will see a list of components which you can drag-and-drop onto the canvas to design your pages to your liking. Use layout components such as Columns, Rows, Tabs, Expander, and Form to organize controls on each page or modal.
6. More Features
a. Data Bindings
Many components, especially Data Window, Editable Data Window, and charts, can be bound to data in your Databricks workspace. Select a component on the canvas and open its properties in the right panel. Add a Binding and choose a source such as a Unity Catalog table, Autoscaling Lakebase database, or another supported data source. Bindings connect UI controls to live data so tables and charts reflect what is stored in Databricks. If a component requires an app resource (for example, an Autoscaling Lakebase or Genie Space), add that resource under the “Resources” tab in the app Settings first, then reference it in the component binding or properties. Detailed walkthroughs for specific resource types are at https://www.vdab.ai/knowledge-base/.
b. Workflows
Workflows turn your app from a static layout into an interactive tool, and they run when a user interacts with a component. For example, clicking a Button, changing a Dropdown, or submitting a Form. Switch to the “Workflow” tab in the app builder sidebar. Create a workflow by choosing a trigger component and event (such as onClick or onChange), then add one or more actions. Connect actions in sequence using onSuccess, onError, or always routes.
Built-in workflow actions include:
- Trigger Toast: show feedback messages to the user
- Show Modal: open a modal dialog window
- Build SQL / Run SQL: construct and execute SQL against your workspace data
- Set Binding: update a component’s data binding at runtime
- Save To Table: write data back to a table
- Start Databricks Job: trigger a Databricks job from the app
- Call Custom Module / Call Prebuilt Module: run Python logic (covered below)
Give every component you reference in a workflow a clear code name in its properties. Workflows use code names, not display labels.
c. Custom Code Modules
When built-in workflow actions are not enough, use Prebuilt or Custom Code Modules to add your own Python functions. VDAB ships a small library of ready-made Python functions for common tasks. In a workflow, use Call Prebuilt Module instead of writing custom code when a prebuilt function fits your need. View the available prebuilt functions in the “Code” tab under prebuilt_modules_library.py.
If the prebuilt modules do not meet your app’s needs, you can create your own python code by opening the “Code” tab and editing custom_modules.py. Each callable function accepts a context object (ctx) that lets you read and update component values and labels, or execute any other Python code. To link these prebuilt or custom code modules, head to the Workflow tab, add a Call Custom/Prebuilt Module action, select your function, and connect follow-up actions as needed.
The “Code” tab also shows the full generated app source (including your custom modules) in app.py so you can review what VDAB will deploy.
d. AI Builder
VDAB also includes an AI-assisted builder to speed up app design. While editing an app, click the “Prompt” button in the top toolbar to open the AI chat. Describe what you want in plain language and the AI can add or modify components, set bindings, create workflows, and update custom module code, all from a prompt.
Review the changes on the canvas, then click the “Save” button when you are ready to persist them.
7. Saving, Deploying, and Running Your App
Use the toolbar at the top of the app builder to manage your app lifecycle:
- Save: persist your canvas, workflows, settings, and code changes in VDAB.
- Deploy: push the generated app to your connected Databricks workspace at the Workspace path you configured in Settings.
- Start / Stop: start or stop the deployed Databricks app compute after deployment.
- Refresh: reload app status from Databricks.
Always Save before Deploy when you have unsaved changes. After deploying, use Start to launch the app for end users.